
 Use of a Compass, Map Bearings, Field Bearings and More
By Ron Watters, Professor Emeritus of Outdoor Education, Idaho State University
NOTE: The following is the first in a series of webpages on using a map & compass. At the end of this page, you'll find a link to the next webpage. If you'd rather pick from a list of topics, you'll find an here: Topic Index.
Introduction
The following series of graphics cover the most of the important techniques of using a compass. It assumes the following:
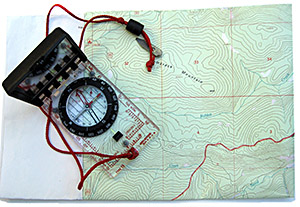
1. You are using a plate type compass (a compass mounted on a clear, plastic plate similar to the one shown in the above illustration or below).
2. You are using a compass on which declination can be adjusted - or if it can't be adjusted that you've use the mark-on-the-compass approach which accomplishes the same thing. For more information on declination adjustable compasses and the mark-on-compass approach, see Using a Compass: Dealing With Declination.
Parts of a Compass
To demonstrate each technique, I'll use a compass with a mirror. The mirror is very handy since, when extended, it increases the length of your compass and makes it easier to take long bearings off your map. It can also be used as a signal mirror, or for shaving, or even putting on your contacts. In the outdoors, it always an advantage to carry items that can be used for multi-purposes - and a compass is one of those.
Note that you don't need a compass with a mirror. The techniques described here work fine with any plate type compass.
Before going into the techniques described below, let's take a look at the parts of a compass:
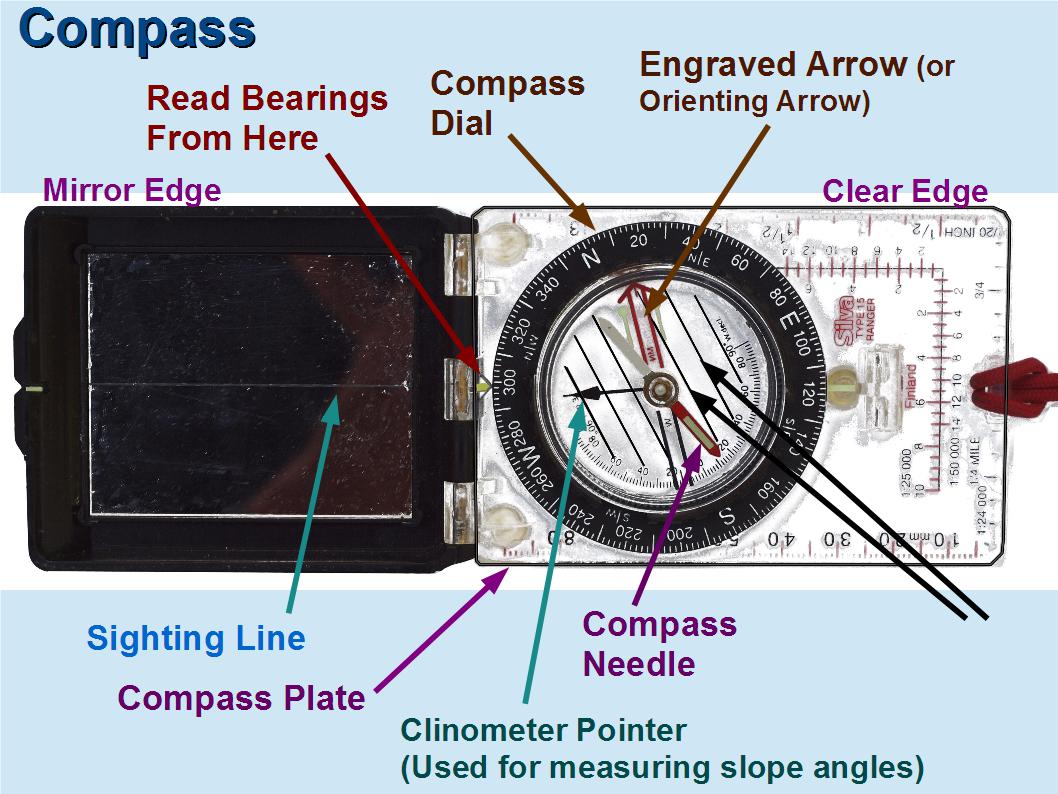
We won't have to worry about the clinometer pointer shown in the image above, but it is useful if you use a compass in the winter and are concerned about avalanches. An clinometer on your compass provides you with a way of measuring slope angles - and with avalanches, we're always leery of slopes greater than 30 degrees. But that's not our purpose here.
To avoid confusion, I use slightly different terms from what you'll normally see in compass texts or on the Internet. I've been teaching map and compass for nearly 40 years, and I use terms which I have found are more conducive to learning. Instead of referring to the big fat arrow which appears through the compass dial as the "orienting arrow," I call it the "engraved arrow." Instead of using the term "orienting or meridian lines, I use the simpler "parallel lines."
You'll be using the edge of the compass to take bearings on your map. You can use either edge; both are fine. But I make a distinction about which end of the edge you use. In the discussions which follow, I'll refer to the mirror edge or the clear edge of the compass. For example, in one technique, you may place the clear edge of the compass on a point on the map. In another technique, you may place the mirror edge of the compass on a point.
No worries if you don't have a mirror on your compass. In that case, you'll just use the front of the edge of your compass instead of the mirror edge. Or you'll use the rear of the edge of your compass instead of the clear edge. The location of the edges are shown below:
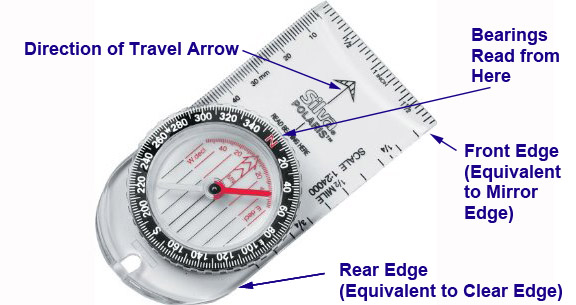
By the way, if you do not have a compass with a mirror, you'll find, instead, an arrow on the compass plate, just in front of the compass dial. That arrow is called the "direction of travel arrow" (shown in the illustration above) It serves the same purpose as the "sighting line" on a compass with a mirror. I'll mention it now and then when pointing out the differences in technique between compasses with mirrors and those without.
Let's move on to the Basic Skills.
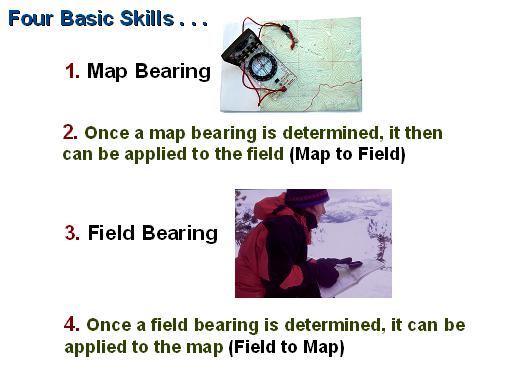
The Four Basic Skills
There are four basic skills associated with using a plate compass. Learn these four skills and you're well on your way to being a proficient with a compass.
We'll start out with how to take a map bearing . . .
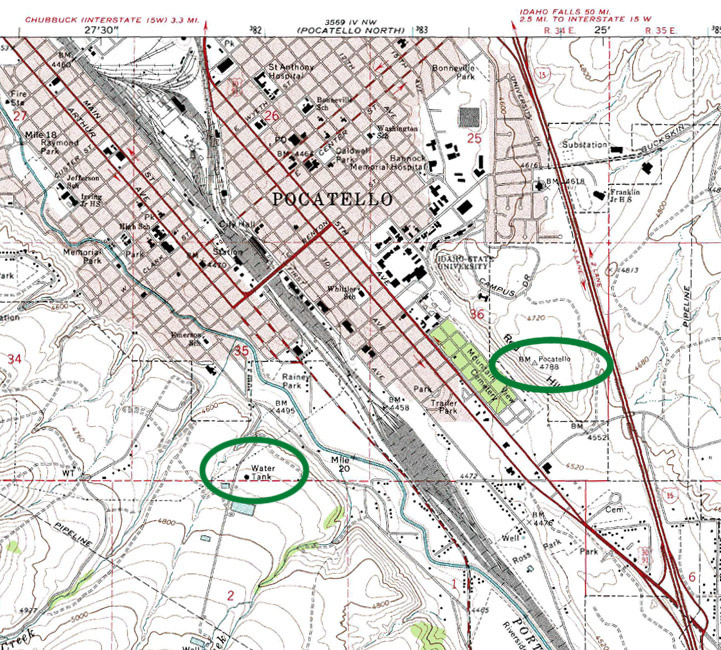
First step. Pick two features on your map. On the following map, I have circled two features. We'll determine the map bearing from the top of Red Hill, a feature in the southern part of the town of Pocatello, to a water tank across the valley:
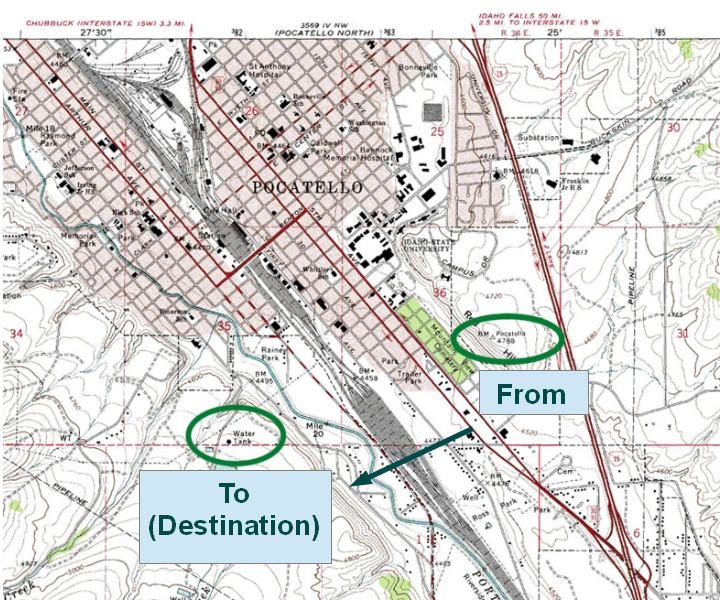
Second Step. Next, think about where the bearing starts and where it ends. In other words, you need to clarify to yourself which point is the "From" point and which point is the "To" point (the destination). In our case, Red Hill is the "From" point and the water tank is the "To" point.
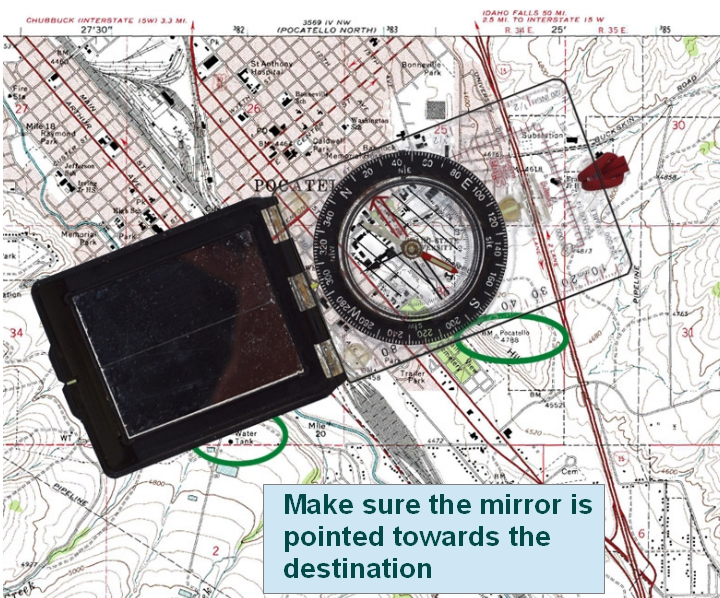
Third Step. Place the compass on the map so that both points are along the edge of the compass. AND (very important) make sure the mirror is pointing toward the destination (the "To" point). If you don't have a mirror on the compass, make sure the direction of travel arrow is pointed towards the destination.
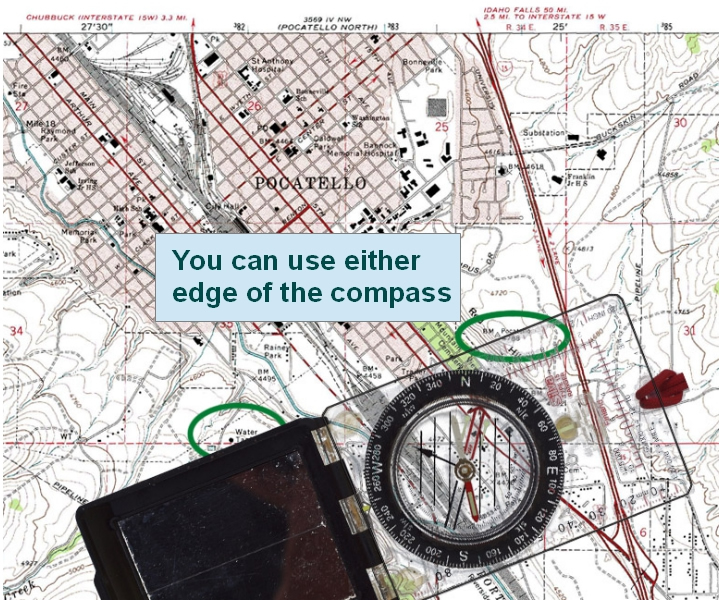
Note that you can use either edge of the compass to line up the two points. The image above shows the left edge of the compass being used. The image below, shows the right edge being used. Either edge works.
Fourth Step. Keeping the two points lined up, hold the compass with your fingers and turn the compass dial so that "N" (North) goes to the top of the map. This is where the parallel lines come into play. You want to make them as vertical as possible.

Fifth Step. The map bearing is read from the top of your compass below the mirror. If you don't have a mirror, it will be read from the base of the "direction of travel arrow." In this example, the map bearing is 248 degrees.*

Congratulations! You done a map bearing!
If you run into map bearings in which the two points are very close together, you'll want to read the information found here.
NEXT: The next section discusses how to apply the map bearing to the field. To reach that information, click here: map to field.
(Or, if you'd rather pick from a list of topics, you'll find it here: Topic Index.)
____
* My thanks to Emily who lives nearly on the other side of the globe from me. She spotted an error on this page. Emily was preparing for a talk about using maps and compasses for her Girl Guides group. I had originally written that the bearing showing on the compass was 238 degrees. But Emily looked closely at it and remarked to her great uncle: "But surely, Uncle Jeff, the compass bearing is 248 degrees?" She was right, of course, and I have made the correction. Thanks again Emily and Uncle Jeff. May you both have many fine days in the outdoors.